

Nearly every app we create for our clients has an Admin role. This role allows the user to have almost god-like powers in the application.
They can delete content, remove users, make changes to content etc. This role is for the person who owns the application or their team members. The application owner can invite team members and grant them privileges.
This article will teach you how to create an Admin role in your Bubble application. We’ll work with the example of a Facebook clone, and the Admin should be able to
- Restrict access of certain pages to the Admin.
- Delete posts that violate the application policy.
- If users engage in harmful behaviour, ban them.
- Allow/disallow groups created by users before opening them to the application users.
Creating the role
In our client applications, we assign a role to all the users, even if there is only one role for the application other than the Admin.
Having user roles allows from the beginning will enable you to hide admin pages, restrict functions solely for the admin, etc.
I prefer having an Option set to store the different user roles instead of a Data type. As the user roles are static and universal, it is better to use an Option set – faster and more efficient.
To create a new Option set, go to Data - Option sets - New option set.
I created one additional attribute, “public_name”, to simplify it. The “public_name” attribute will be what the users can see when signing up. This attribute is entirely optional.
Assigning user roles
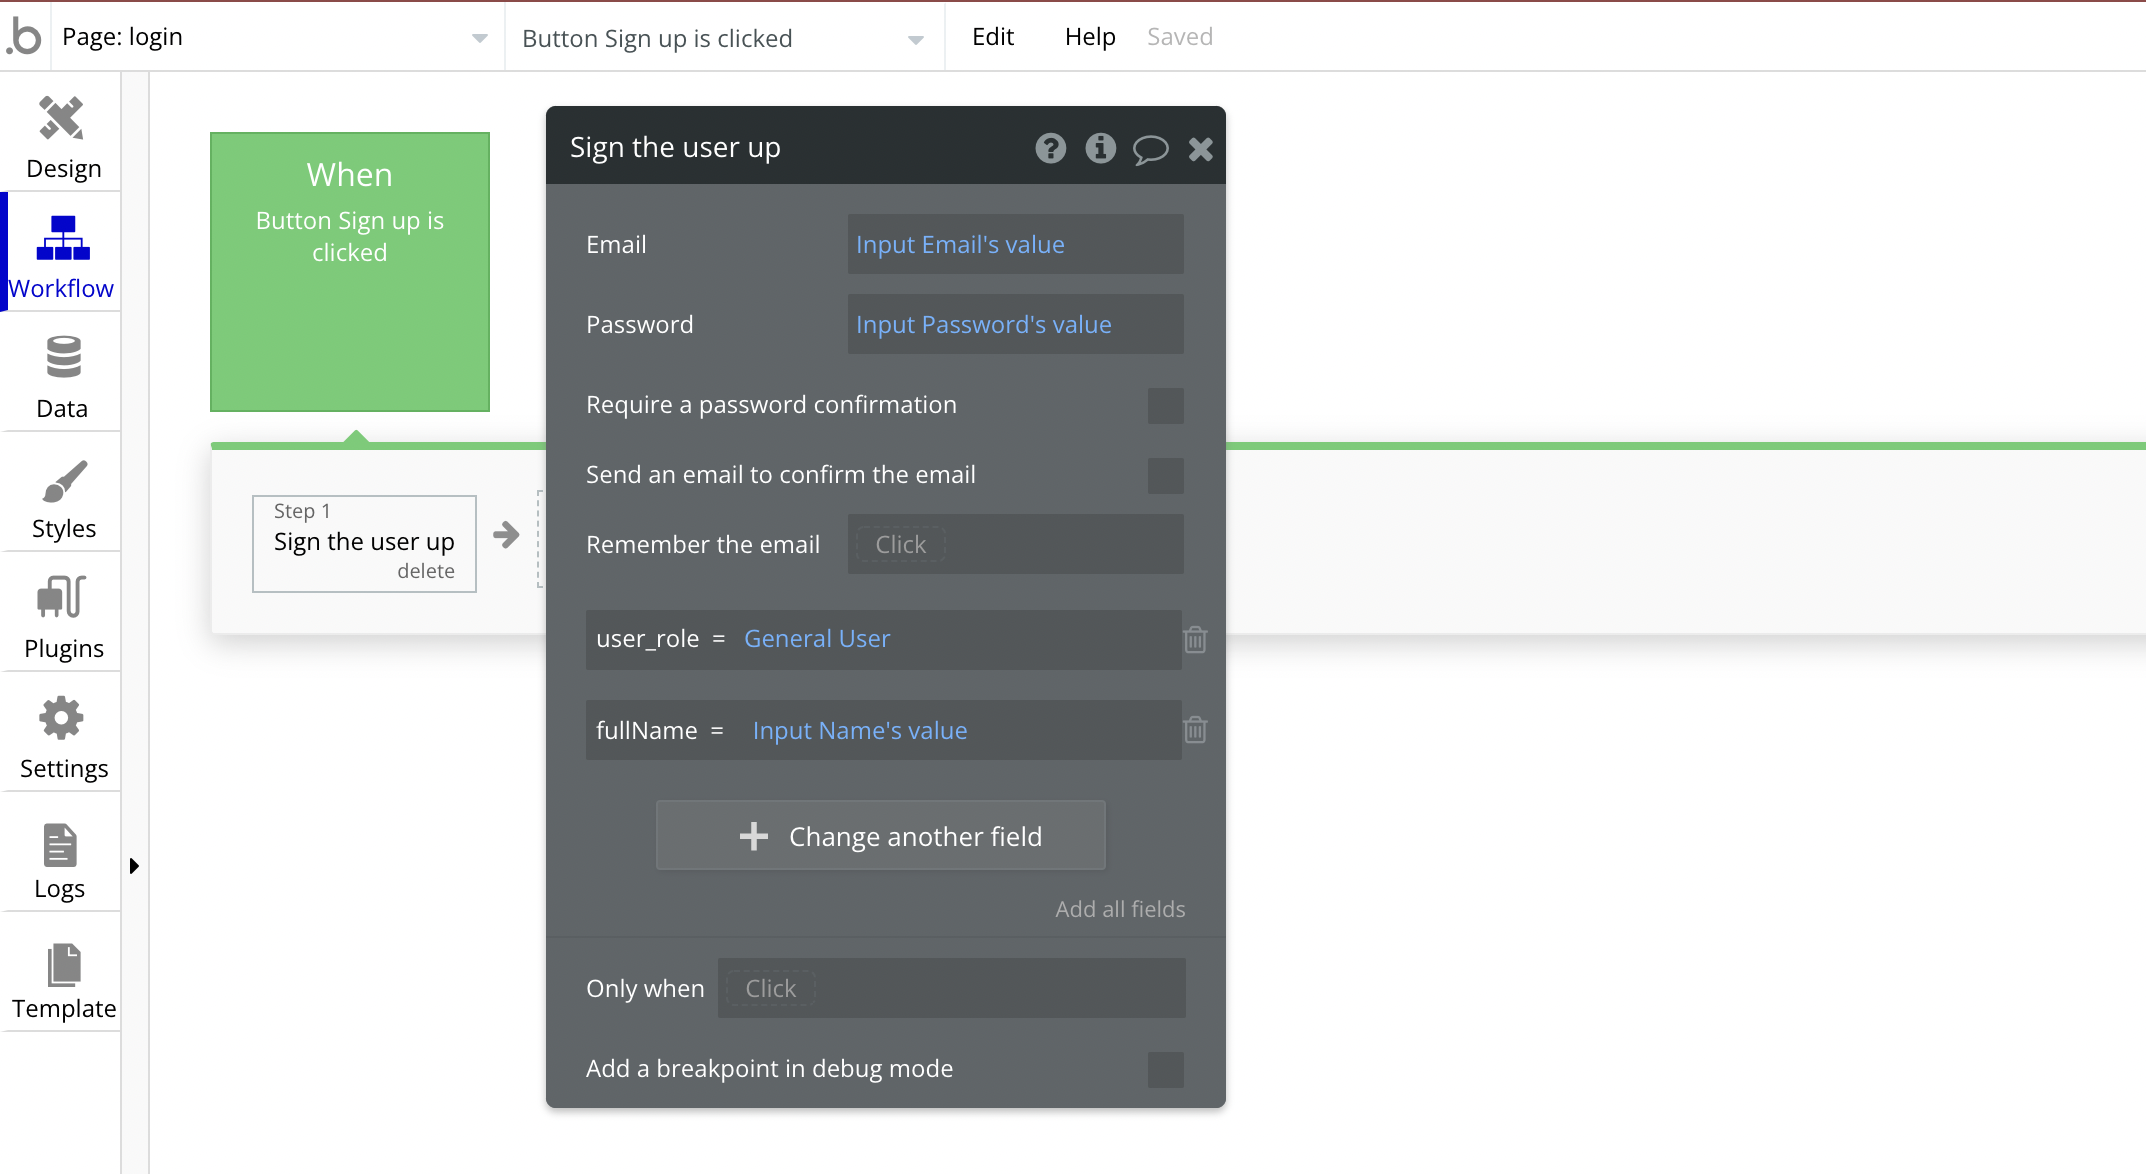
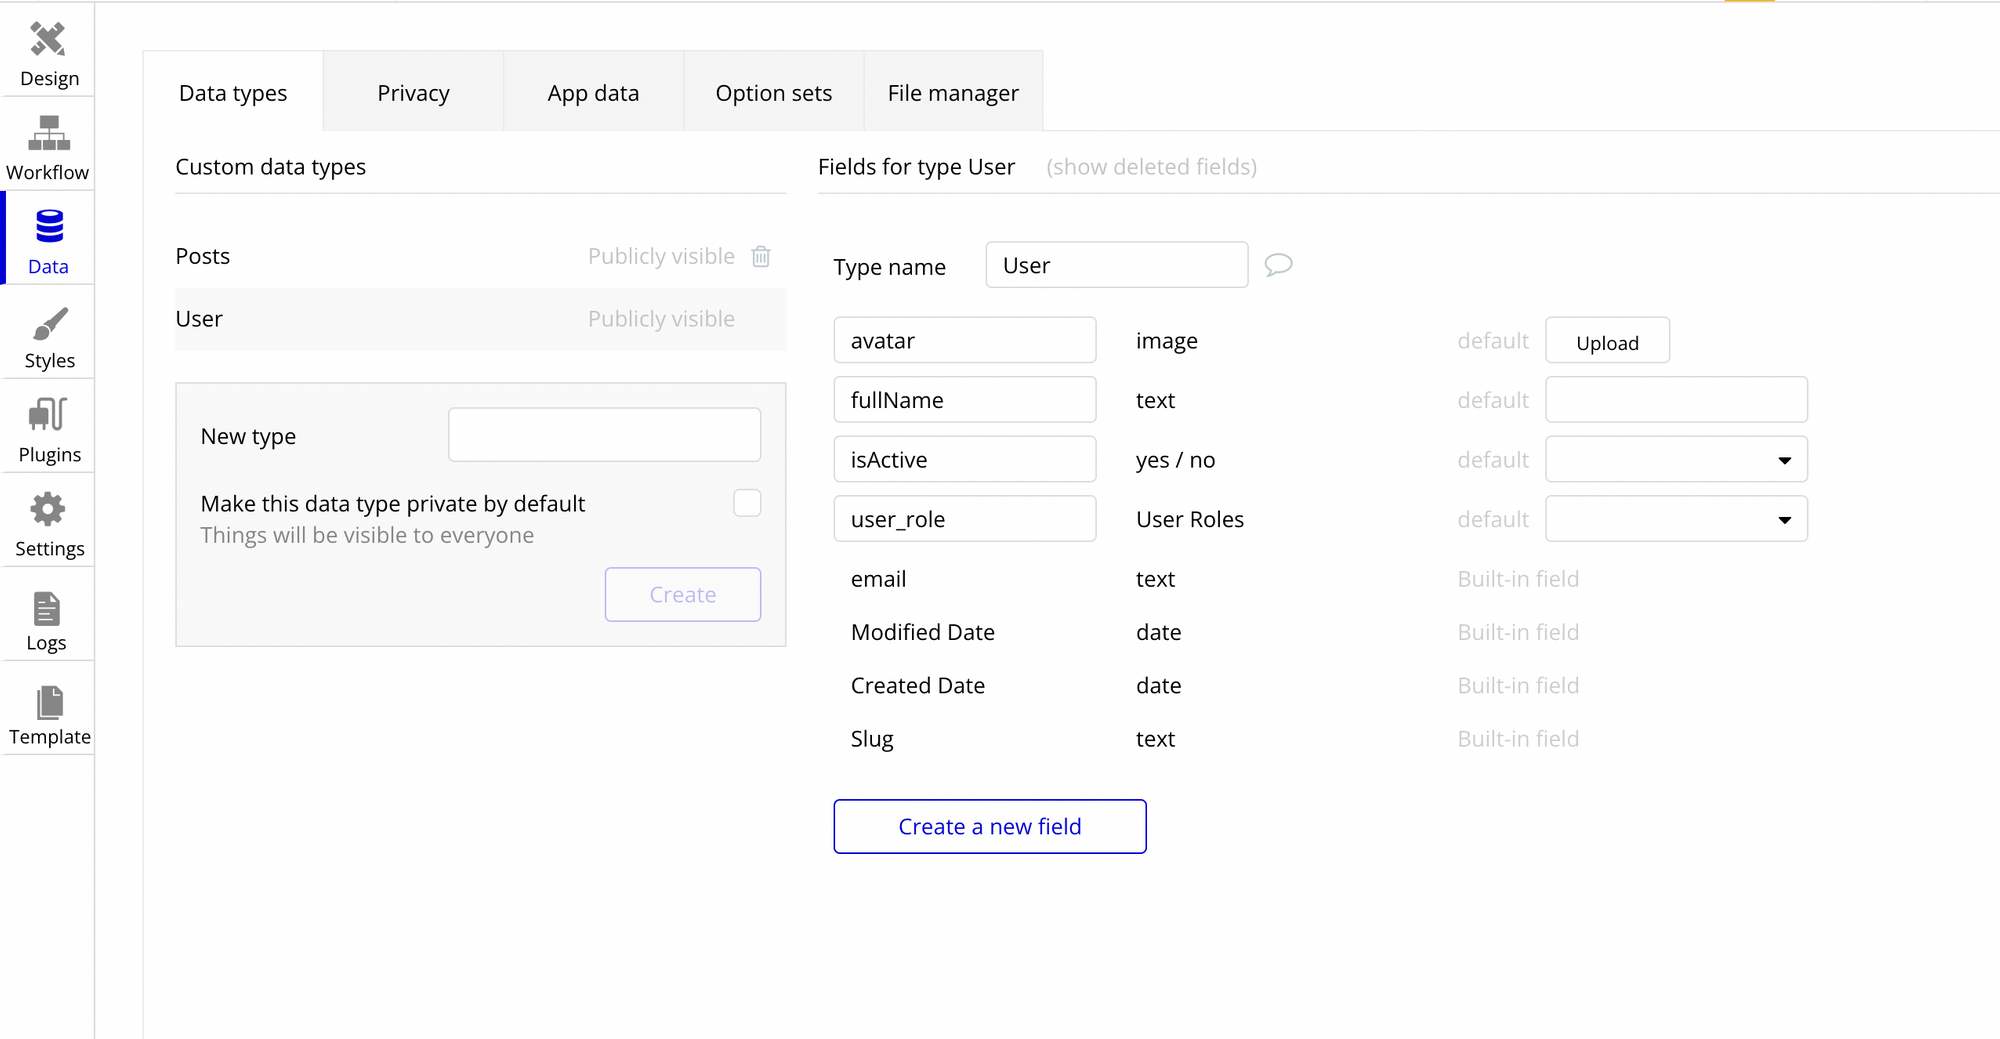
Since we have only two user roles in this example, we will assign all the users the “General User” role during signing up. In the User data type, we have a field called user_role that stores each user's assigned role.

We ask the user for their name, email and password on the login page. We aren’t asking them to choose a role as they all will be assigned the same role.
If your application has more than one user role for general users, you can create your business logic to give them roles.
We’ll store this role when signing up to keep things simple.
Restricting page access
There can be pages in your Bubble app which you don’t want any users to access except the Admin. It can be the Admin dashboard page, for example.
We'll create a conditional workflow to restrict this page to be only accessible by users whose user_role field in the User data type is Admin.
Create a “Do when condition is true” workflow in the workflows.
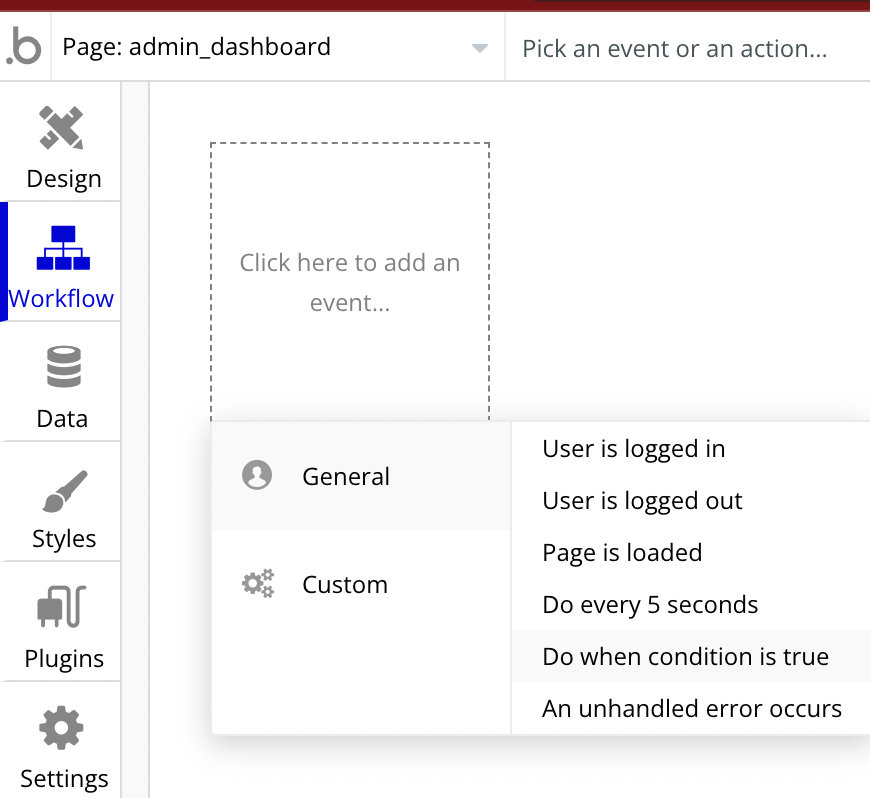
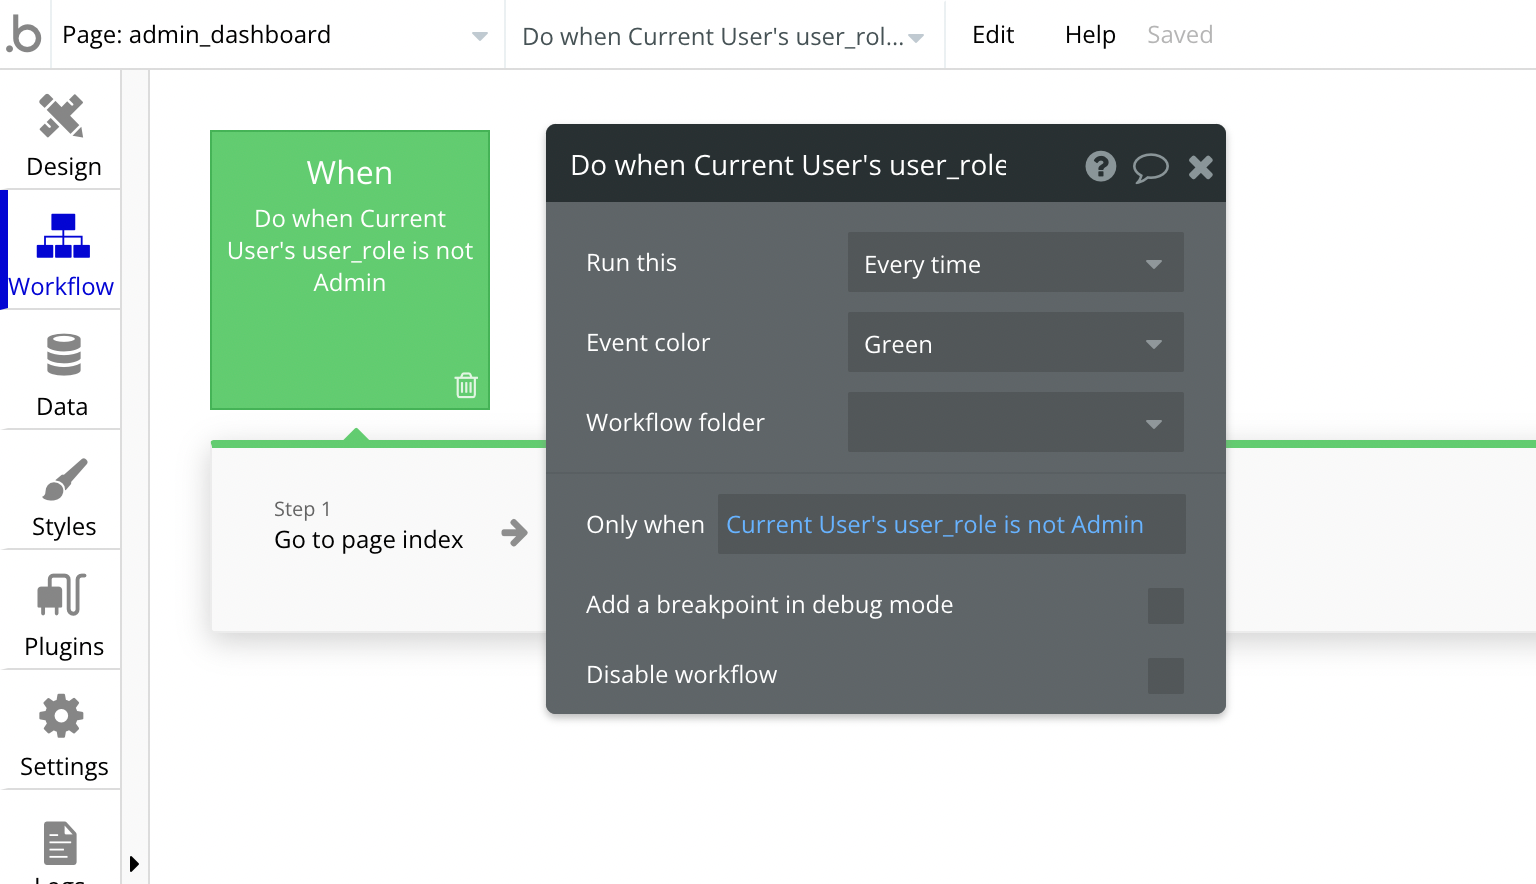
Next, we need to create a condition that will run this workflow when true. Simple to guess, the condition will be that if the user_role field is not Admin, the user should be navigated to another page, say the homepage.
So I created a condition that Only when the Current User’s user_role is not Admin, Bubble should navigate the user to the index page.
Delete posts that violate the application policy
To delete posts, we need a field in the data type where the posts are stored to flag them as deleted.
A simple data structure that I’ve created to store the posts and flag them is to have an isVisible field in the Posts data type. This field will decide whether the Posts is visible to the application users or not. This Yes/No type field will be set to Yes by default.
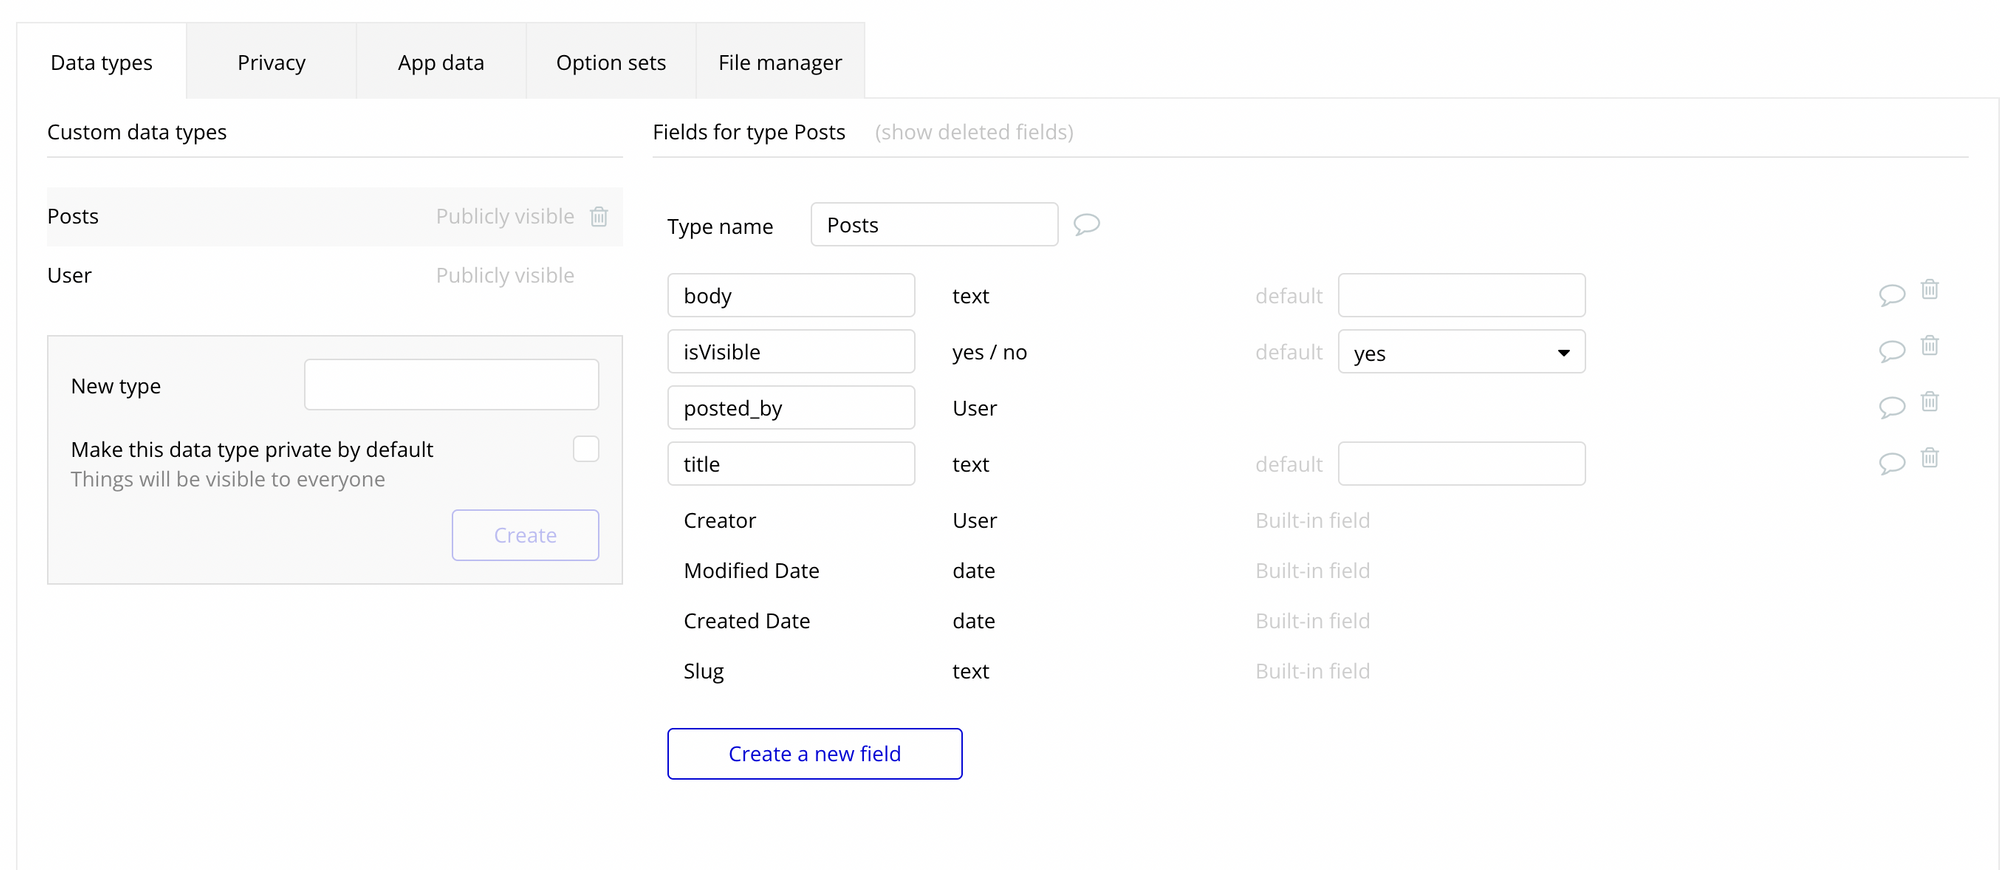
I could simply delete the posts, but it is better to hide the posts than outright delete them as a safe practice. This way, you can retrieve the posts if needed in future and also, it is faster to update a field in Bubble than to delete a record.
We’ll now create a workflow to allow the ability to update the isVisible field only to the Admin.
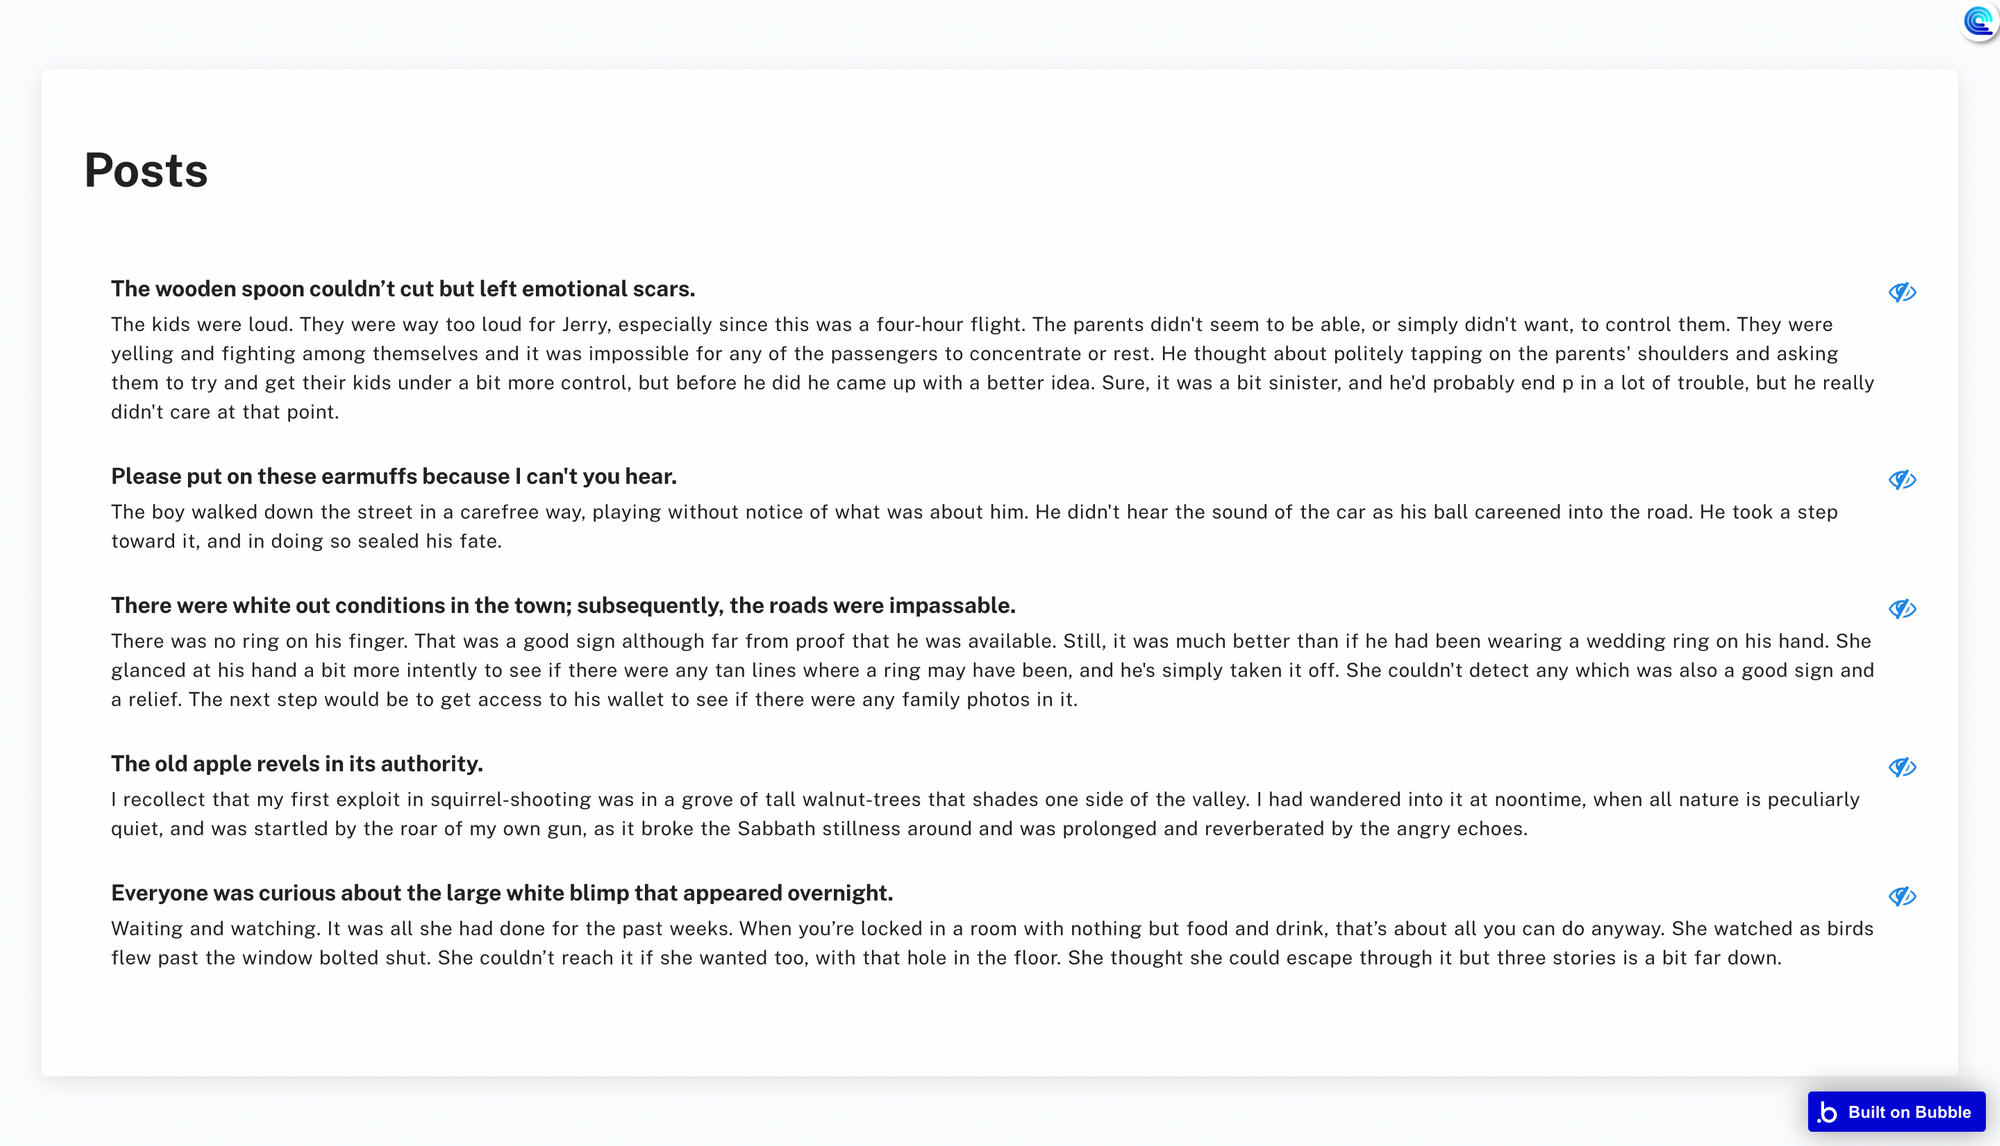
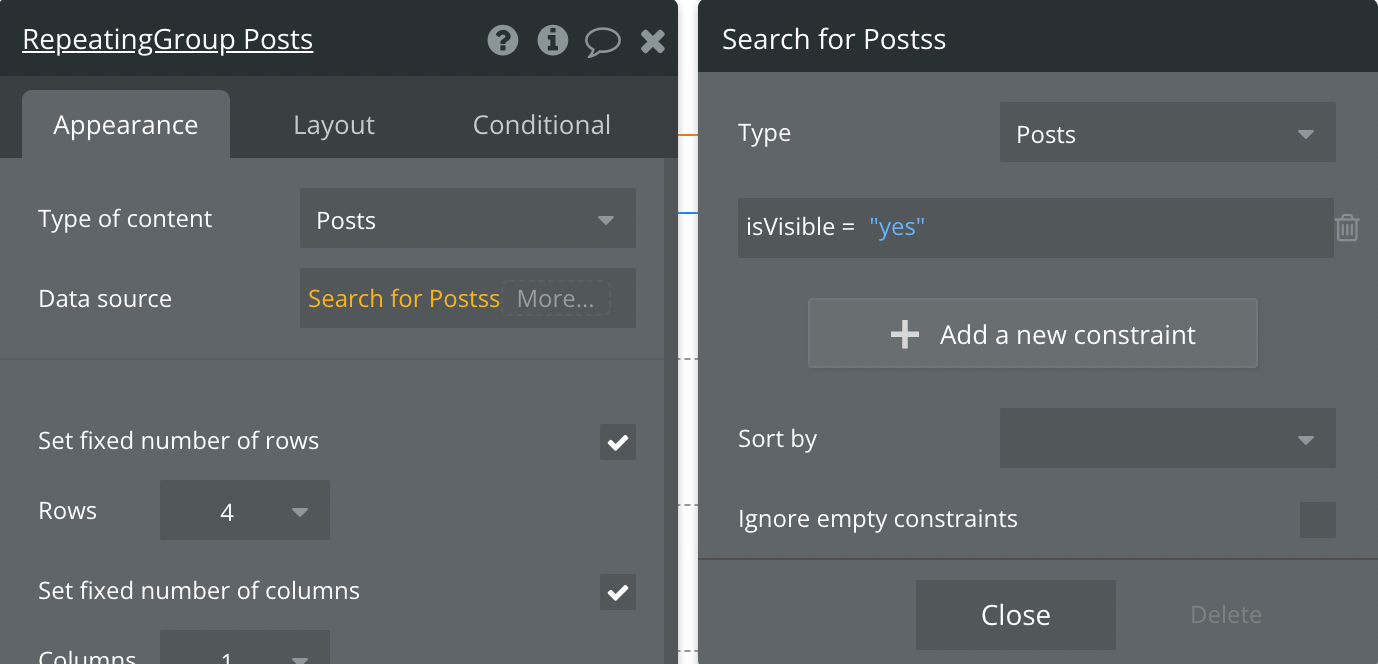
In the repeating group displaying the Posts, we have a constraint to search for Posts where the isVisible field is Yes.
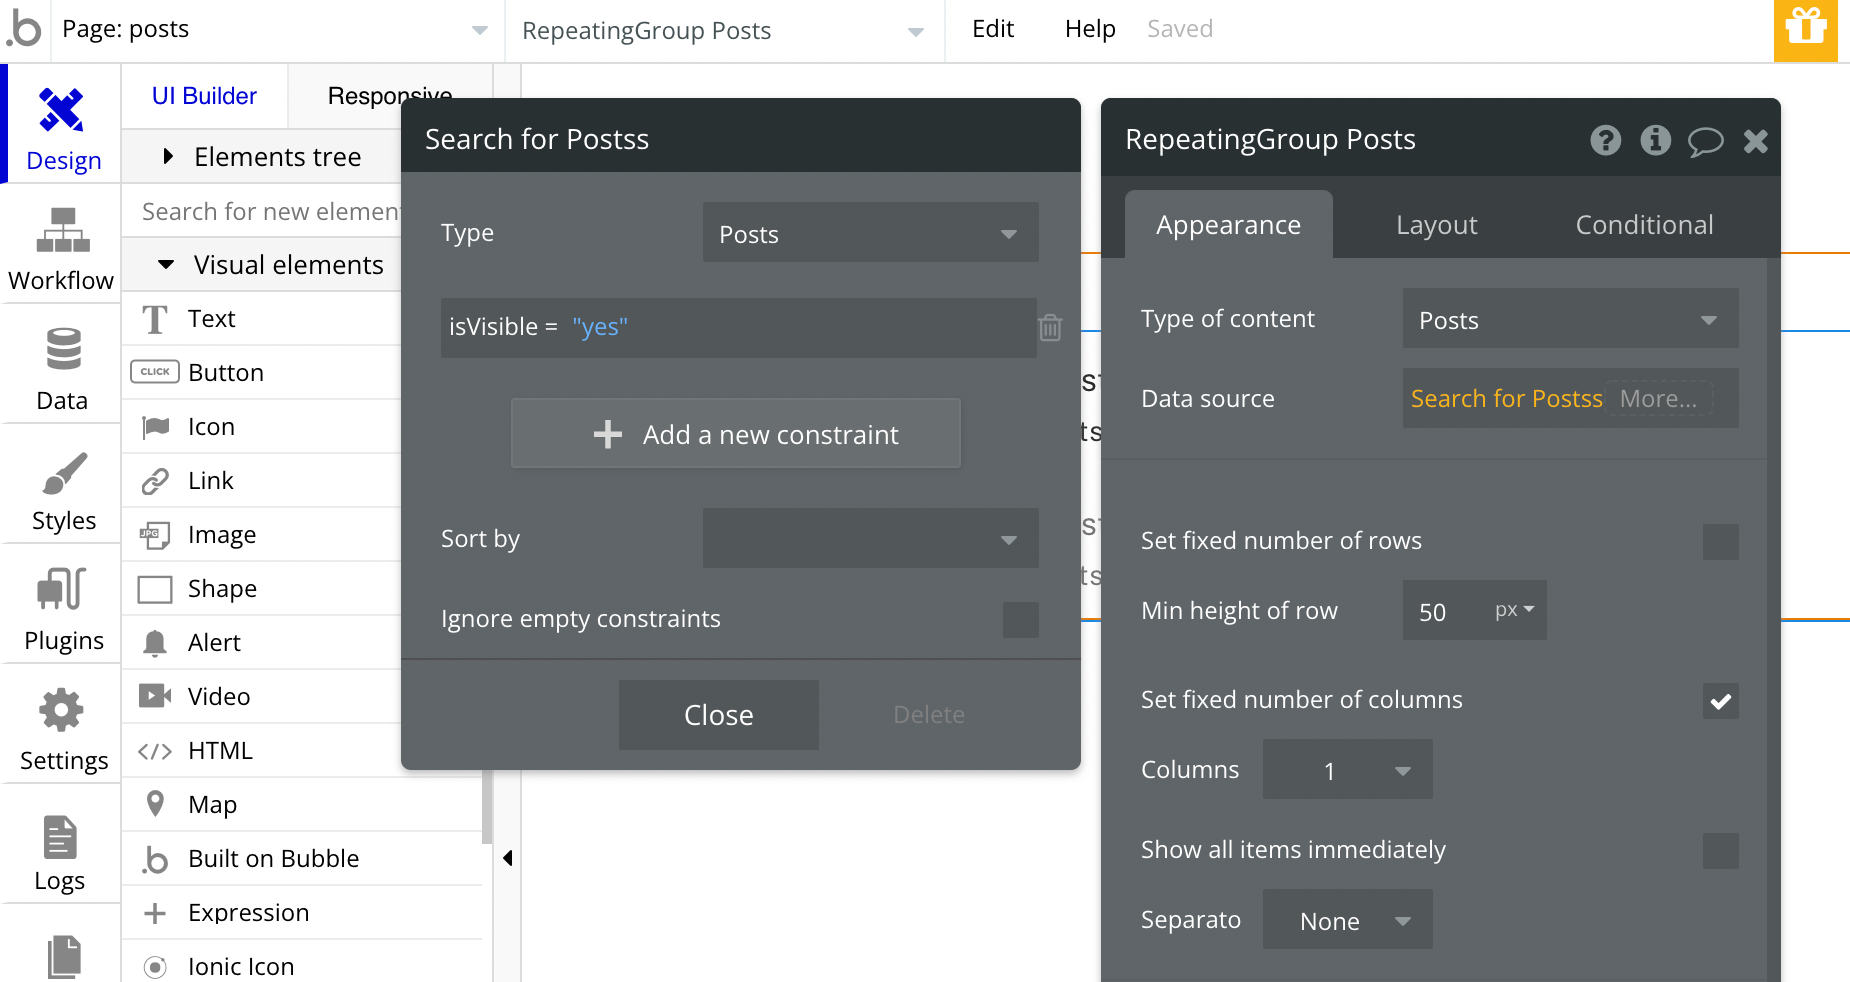
Next, we’ll add a small icon. This icon, when clicked, will run a workflow that will update the isVisible field to No. As a result, this post will not show in the repeating group results as the constraint we applied above will filter it out.
Now that we have a workflow to flag a post, we would like only the Admin to have the ability to do this operation.
With the help of conditionals on the icon, we can add a condition that this icon should only be visible to the Admin. This icon will not be visible by default and only be visible to the Admin.

The condition will be Only when the Current User’s user_role is Admin, and the property to change will be to check This element is visible.
If users engage in harmful behaviour, ban them
Like deleting a post, we can also flag users if they indulge in harmful behaviour. We can have a field in the User data type that determines whether the user has permission to use the application or not.
The field named isActive will determine whether the user can use the application. It is a simple Yes/No type field, which, when marked No, will restrict access.
On the Admin dashboard page, we have a repeating group that displays a list of all the users and their information. And in the repeating group, we have a toggle button. This toggle button is linked to the isActive field in the User data type using auto-binding.
Auto-binding is a feature in Bubble.io where the input’s value is associated with a field in a data type. And when the input’s value is changed, the corresponding field is updated in the database. Auto-binding allows you to edit a field’s value without using workflows.
 Himanshu Sharma
Linking the toggle button with the isActive field in the User data type using Auto-binding, we can easily control a user's access to our application. If the toggle button is unchecked, the user no longer has access to the application.
Now all that is left is to create workflows to
- Prevent the user from logging in if the active field is No
- Logging out the user and navigating them to the login page
We’ll create a simple reusable element with required workflows and place this reusable element on each page. Alternatively, if we already have a reusable element on every page, say the header, we can create the workflows in the header element itself. Doing this will save us the trouble of making the workflows again and again on each page.
I created a reusable element called user_access and made the reusable element a popup. This popup won’t be visible to the user, so we can skip creating any visual elements here.
We create a “Do when condition is true” to log users out and navigate them to the login page. As you can guess, the conditional statement will be Only when the Current User’s isActive is No, go to page login.
Whichever page we place this reusable element user_acess on will redirect inactive users to the login page.
We also need to add a condition to the login button on the login page.
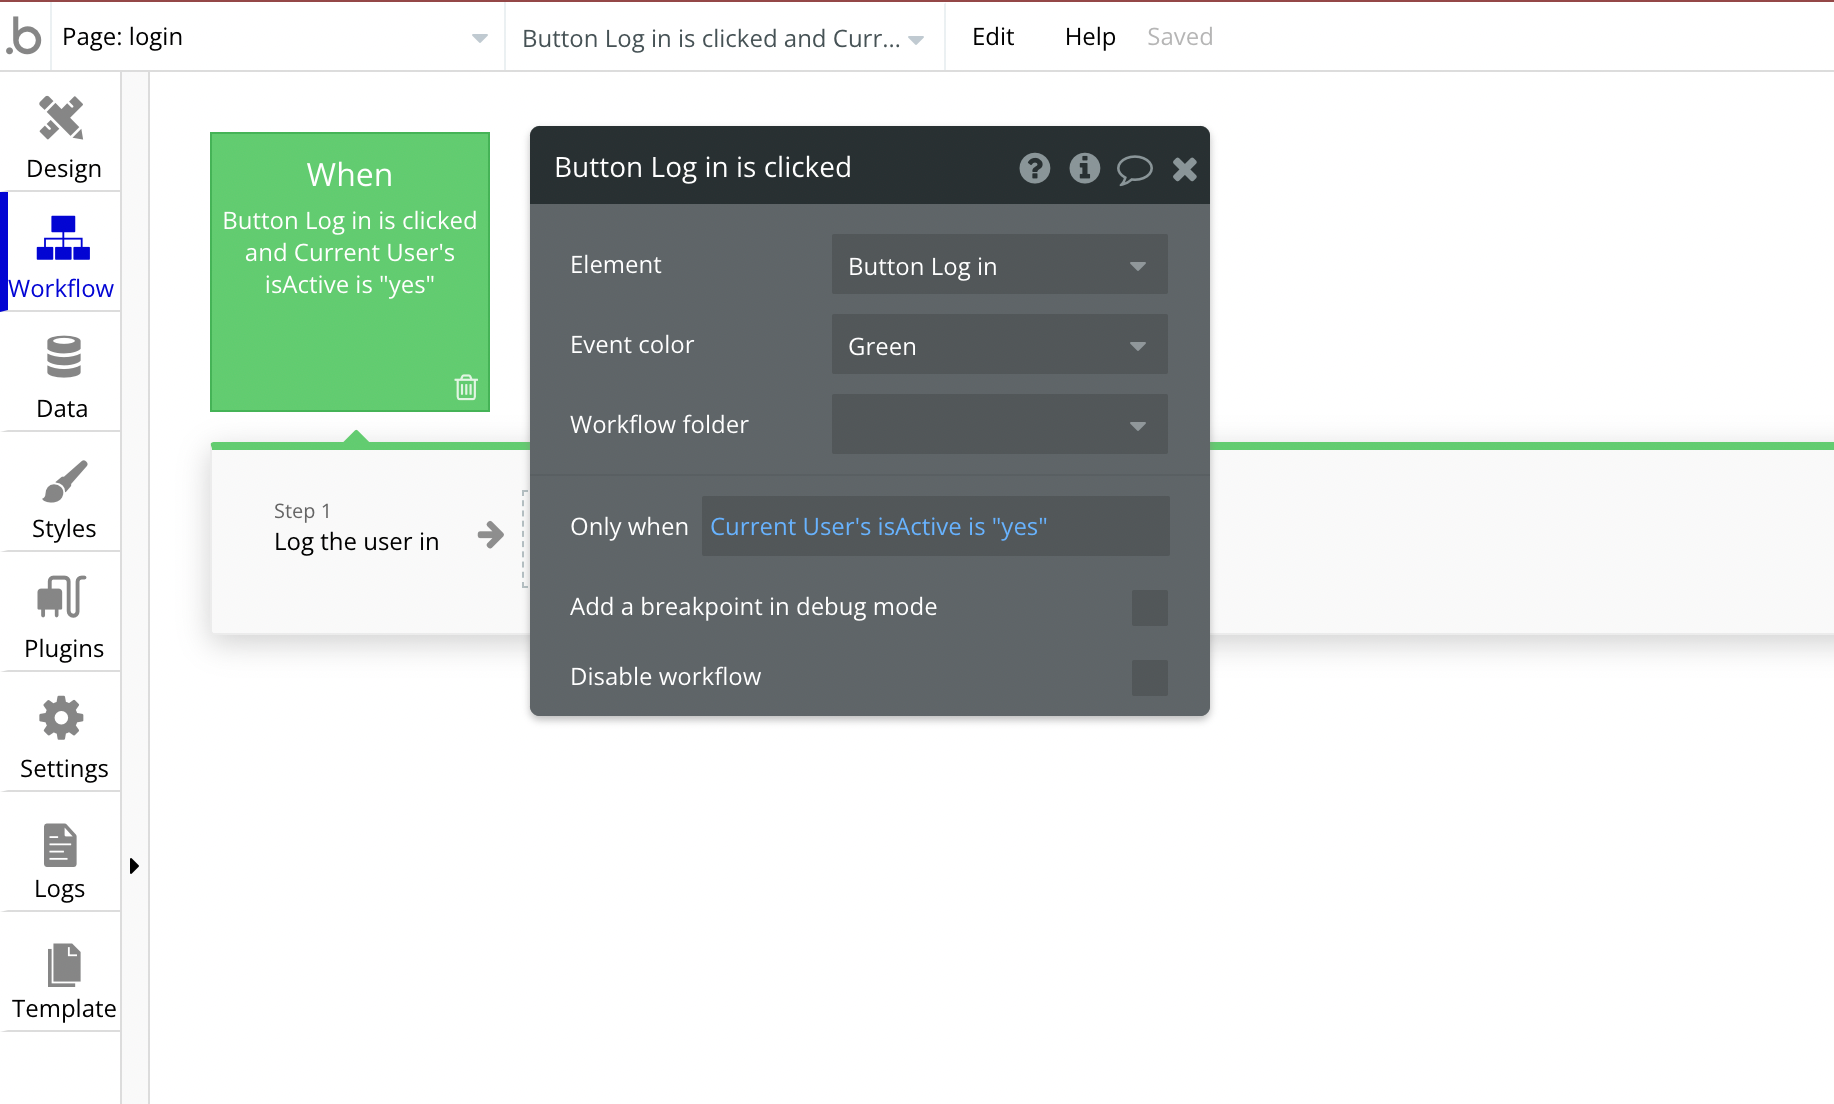
In the workflow of the login button, we add another condition: if the isActive field of the user who just logged in is No, the user will be shown an alert and immediately logged out.

Allow/disallow groups created by users
Users can also create groups and build a small community in our social media application. However, we would like to curate the groups and balance quality and quantity.
All the created groups are not made public to the application users unless approved by the Admin. The Admin can see the groups with pending approval, and approve or reject the group.
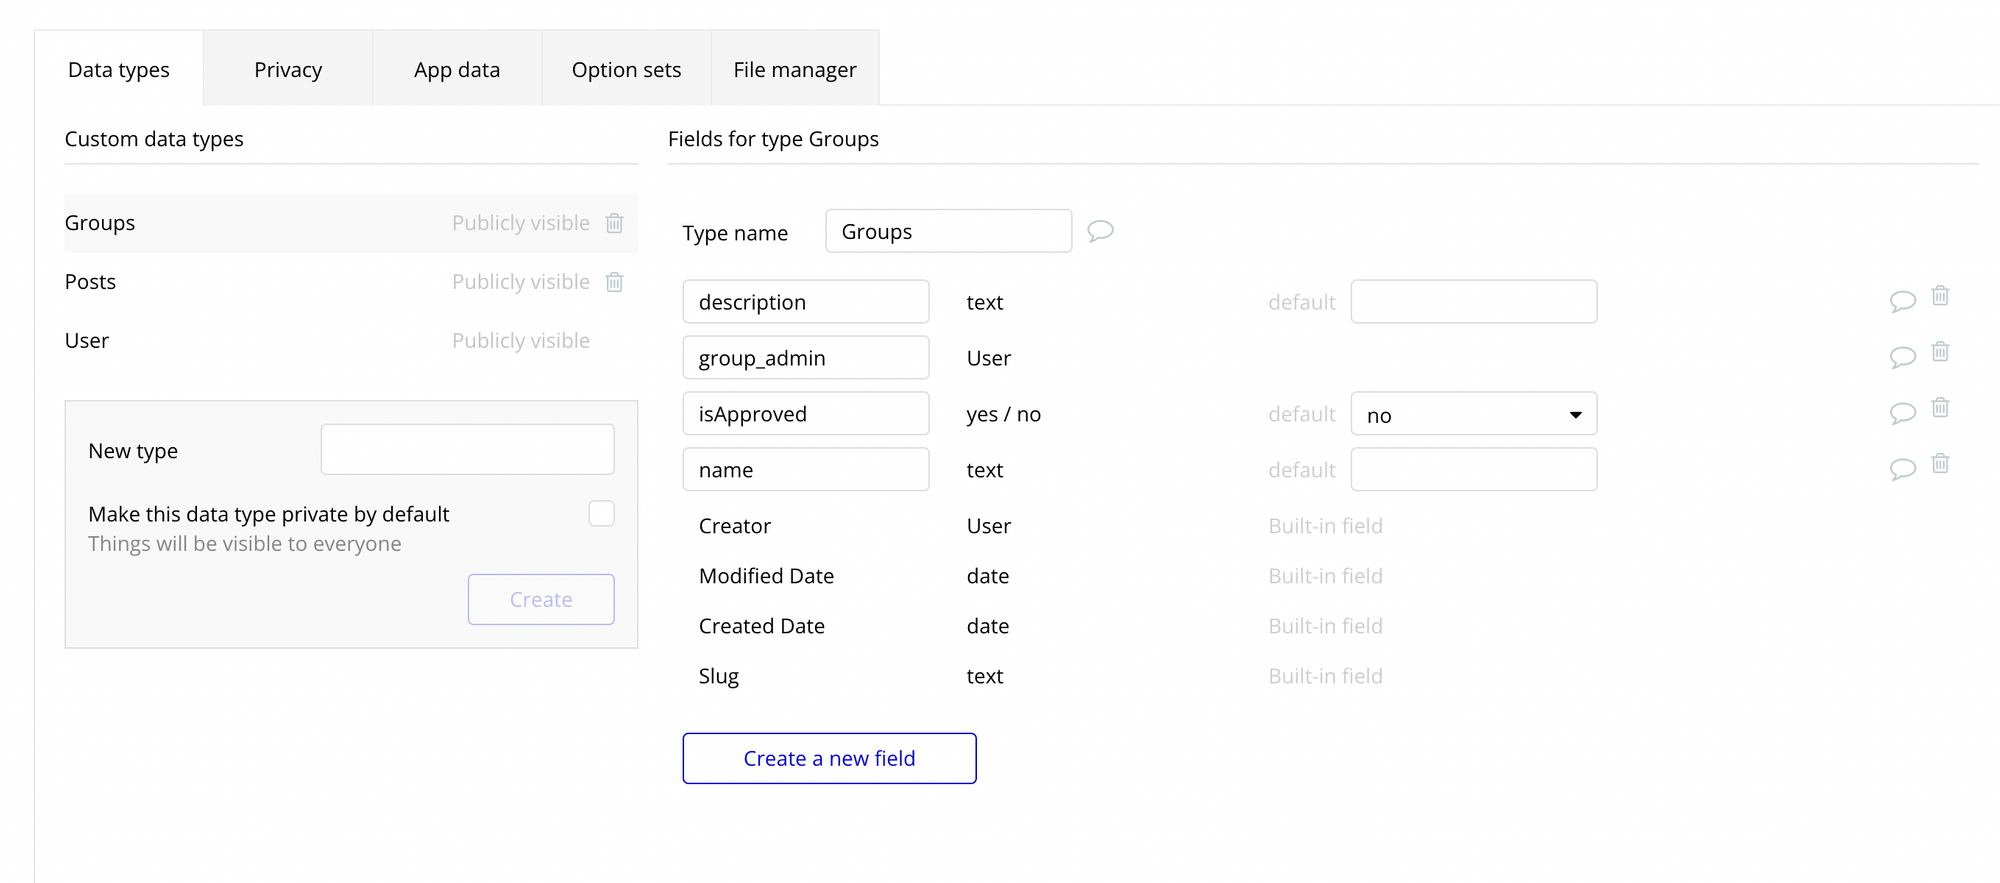
Doing this is simple in Bubble.io. We simply need a field to store whether a group is approved or not. In the Groups data type, we can create a Yes/No field called isApproved. This field's value will be No by default, but it will turn to Yes once approved.
And wherever we are displaying the list of available groups, we can add a constraint to that repeating group to filter out groups that are not approved. In the repeating group, we can have a constraint to search for Groups where the isApproved field is Yes.
Back in the Admin dashboard, the repeating group displaying the list of groups pending approvals have a checkbox next to the group's name and basic details. When the checkbox is checked, a workflow should trigger to update the isApproved field as Yes.
We’ll create a new workflow that triggers automatically when an input’s value is changed. Click on Add a new event in the workflows - Elements - An input’s value is changed. Now select the checkbox as the element to watch. We’ll add an action to make changes to the current cell’s Group.
We will select Make changes to a thing, and the thing to Thing to change will be the Current cell’s Group.
Now the Admin can approve or reject groups created by users and curate the available groups.
If you need some help with your Bubble app or if you need a team of Bubble developers to build a Bubble app for you, reach out to me at [email protected]. You can also follow me on Twitter.


Join the conversation.